Sunday, July 17, 2011

Cyclone Sewer Vent

Today I upgraded the vent on the black holding tank with a Cyclone vent cover.  This type of cover uses the passing breeze to create a draw out of the black tank to pull odors up and out.  The original vent cover pictured below is simply a rain cover.

First remove the screws on the vent cap cover as well as the base


Once both pieces are removed, carefully remove all the old caulking without damaging the roof.  In our case this is a TPO roof.


After everything is clean, drill three small holes through the base of the Cyclone cover and vent pipe to install three small screws to anchor the Cyclone to the vent pipe.   This means you also have to install the Cyclone vent cap and the base at the same time so I used some masking tape to hold the base up while I put in the screws. 

Then seal all the original installation holes, around the vent pipe where it comes out of the roof, and then finally seal the base cap to the roof along with the space between the Cyclone pipe and base cover.

The Cyclone fin will turn the unit with the most gentle breeze to ensure it is always providing a draw from the tank with the breeze.

Sunday, April 24, 2011

Air Conditioner Compressor Capacitor

I read some articles where people were able to start their air conditioners off one Honda EU2000i by increasing the size of the compressor starting capacitor. Here is one of the articles http://www.modmyrv.com/2009/05/27/rv-air-conditioner-hard-start-capacitor from the modmyrv website. We have a 13500 unit on our 1685, and I have two Honda EU2000i's that I parallel together to specifically run the air conditioner when we are out in the desert so I thought I would try this mod. I ordered a SPP6E from Patriot http://www.patriot-supply.com/products/showitem.cfm/153429 and installed it yesterday. Here is the install.

The cover has 4 bolts on top that you have to remove to lift the cover

Image

The capacitors are behind a plate on the slide out side of the trailer. Removal of two screws allows you to pull the plate off.

Image

There are two capacitors in this area. A tall round one for the compressor and a short oval one for the blower.

Image

The SPP6E is made to piggyback onto the tall round capacitor for the compressor and there are available contacts.

Image

Remove the wire strap that holds the two capacitors in place, clip the two leads of the SPP6E to open contacts on the tall round capacitor, and install all three back into the box with the wire safety strap holding all three in place.

Image

Put the cover plate and cover back on for the electronics and unit, and you are done.

I was able to start and run our 13500 unit on one EU2000i. Start up required about 1500 watts and once the system was running, the draw was a constant 1320 watts. Plenty of room to spare for one EU2000i.

****UPDATE JULY 12, 2011****
I have found that altitude affects my fix on this.  Camping at 6000' in Alabama Hills by Lone Pine, CA and could not start the A/C on one generator.  Had to use both in parallel to run the A/C.  Works fine at sea level with just one generator.  Obviously I am close to the max power draw on one generator at sea level and the altitude lowers the power generation enough to drop below the power level needed for the A/C.  I will continue to test in different locations as we camp to gather more data.


****UPDATE MAY 13, 2012****
A good friend passed to me information from a Coleman Technician that the the Supco SPP6 capacitor that many forums recommend to help start our A/C compressors are no good and will shorten the compressors life.  The Tech recommended a Coleman 8333a9021 start kit. I ordered one off Ebay for $21.  Swapped it out with the SPP6 and everything still works great.  I have not been camping in altitude since my last update so no new news on using one generator yet. 

Improving Radio Reception

Our radio has never gotten repception since we bought our trailer. Read several times where people found the antenna wire balled up behind the radio so decided to look yesterday. I found a 75 ohm antenna connected and mashed behind the radio. Even when stretched out, this antenna was not pulling in signals very well. Decided to upgrade the antenna to the 300 ohm connection on the radio and run tv coax to the tv antenna panel by the tv.

First, I removed the microwave and snaked a coat hanger over the fridge and through the hole for the antenna panel.

Image

Then I taped a 12 foot coax to the hanger and pulled the coax back though the hole to the microwave cabinet.

Image

The antenna panel has a connection for a second tv (plus the sat connection that is not hooked to anything) so I connected the coax to the "set2" connection and reinstalled the panel.

Image

Now with one end connected, I ran the coax along the outside wall in the top of the cabinets to the radio and connected the coax to a 300ohm coax to terminal connector. We now get GREAT radio reception.

Image

After installing the radio back to the cabinet, I pulled the remaining (about 2 feet) cable back though the cabinets and pushed it into the space above the fridge. Add a couple cable holders along the top wall to hold the cable up and out of the way, and all is done.

Guess if we ever want to add a second tv to the trailer I will have to rethink this but I am not sure where we would put another tv!

Thursday, December 2, 2010

October and November Upgrades

Motion Sensing Outside Light

We wanted to increase our security around the trailer so we decided to replace the outside porch light (with the yellow cover) with a light that senses motion and automatically turns on.


If you pry the cover off the light above, you can see the four screws below that hold it onto the trailer. 


Remove the four screws and you can remove the housing and use a putty knife to carefully pry the backplate off the trailer.


We chose this light and were very happy to see that the installation holes matched the original fixture.


Once it was sealed and mounted, you would think it was original equipment.  It works like most sensors in that you turn on the power, turn it off and quickly turn the power back on again to put it in motion sensing mode.  Then it only comes on after dark  when it senses somthing near.  I would like to put a couple more on but I will have to figure out how to wire them to the other sides  of the trailer.


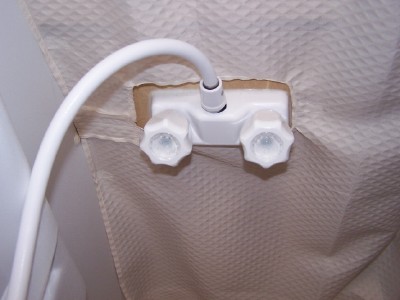
Accumulator Tank Mod

We are  trying to decrease the sound level of the water pump, as well as the cycling of it.  I ordered a shureflow accumulator tank and installed it.  We also covered our water lines in foam insulation.  We lowered the noise a little but overall I did not beleive this mod helped very much.


TV Antenna Mod

We have a Winegard Sensar III TV antenna that you manually rotate to pickup the best TV signal.  I installed a King Controls SureLock SL1000 Digital TV Signal Finder so that I could tell when I was pointed in the best direction for maximum signal stength.


I permanently inserted the meter between the powered antenna out jack and the TV inside the trailer and velcroed it to the wall by the thermostat.  The meter uses one 9V battery, has an on/off switch, and also a sensitivity dial so you can adjust the meter sensitivity to work in whatever environment you are in.  I also installed a Winegard Wingman on the antenna to increase the UHF sensitivity for digital tv signals.


Here is the picture of the Winegard Sensar III prior to the installation of the Wingman.


Here is the picture of the Wingman installed on the antenna.


And here is the proof of signal gain using the Wingman.  This mod will allow us greater ability to pickup over the air digtal HD tv as well as ensure we have pointed the antenna in the best possible direction for reception.


Flag Pole Installation.

I enjoy flying our flags while camping, so I purchased a flag pole holder that I can put under any of the jacks or wheels of the trailer.


So far, I like putting it under the front jack of the trailer and adjusting it so that the pole comes right up beside the front frame by the LP bottles.


Here is a picture with the pole and US flag flying.  We also have a locator flag we use when in large groups but it is not in this picture.

I also installed a 12V cigarette lighter plug in the outside compartment behind the refridgerator to power our 12V lights we hang from the awning but I don't have any pictures of it yet.  I will post pictures later.

Friday, October 1, 2010

Small Modifications in the beginning .....


First of all, I must tell you that this trailer is the biggest little trailer you will ever find and the best!  When we first took delivery of our trailer in December 2009, we needed a fix for the shower curtain because the shower faucets and water line to the shower head blocked the curtain from closing all the way.  Lance provided us with a modfied curtain that would fit around the controls which were mounted on the vanity in the bathroom.


The curtain has an access hole that can be closed with velcro.  We added several other velcro tabs around the control and along each edge of the curtin.


Now the curtain stays in place and does not move when moving the shower head around.  The velcro was worked great and there is no problems with it coming off the shower wall or vanity.  I would prefer the controls were mounted on the outside wall, however we feel that the current solution is one that we can live with.


We also added a strip of velcro across the insets inside of the shower to help hold bottles when placed in them.  Otherwise we could not get any bottles to stay in place.


This same idea was used inside the medicine cabinet to keep everything in place and has worked very well.  The door shuts over the velcro and nothing falls out once you reach your destination and open the cabinet.  Where would this world be without velcro?


We never used the key rack installed above the entry door so we removed it, drilled two holes in a plastic paper towel holder to match the intallation holes on the key rack, and installed it.


We then cut a wooden down to insert between the two end caps to ensure the paper towels would not bounce loose.


Then simply add your paper towels and they are out of the way, and accessible from either inside or outside the trailer.


A great idea for keeping the dishes in place was to put a standard dish rack inside the cabinet above the sink and place the dishes in it as if they were drying.  This allows easy access and keeps everything safe (including the glass base of the microwave) while in transit.


Like many Lance trailer owners, we chose stackable containers to take advantage of the vertical space within the closet areas.  They really provide a lot of space and a small bar across the bottom keeps them from sliding out during transit.


The last modification we did when we first received the trailer was to add pads to the stabilizing arms to have a larger base area on the ground.  Since we never camped with the trailer without the pads, I can not discuss the overall change in stability however I like the larger base area.

Wall Clock and Vent/Door Shade Covers

September 2010

This month we replaced the original analog clock that you could hear (tick....tick....tick...) all night long.  It never kept accurate time anyway.


The new clock is a LaCrosse Atomic clock wtih weather and also an outside wireless temperature gauge that we set on top of the slideout.  No more tick...tick....tick  all night long and it looks nice as a direct replacement.


We also wanted to put some type of light shade on the vent over the bed, as well as the door window to help keep the trailer a little darker once the sun comes up in the morning.


We found premade covers that were inexpensive so we decided to try those first before making our own and it was the right choice.  The vent cover attached with velcro tabs and really kept the light off the bed.


The premade door shade was about 3/4" too short but ended up working just fine.  It also stopped the majority of light coming from the door.  I guess we are ready for Alaska in the summer now!

Thursday, September 30, 2010

Battery Monitor and LED Light Replacement

May - June 2010

Wanted to have a better understanding of our DC power consumption so after a lot of research, decided on the Trimetric 2020 meter with a 100A shunt.  The 100A shunt provides an extra decimal place on the reading so I am able to get specfic values for appliance useage.

The installation was pretty easy.  Installed the shunt in the battery box, ran the signal cable along the same run as the DC supply line to the power distribution panel and installed the meter under the sink and to the left of the Lance standard monitor.


We were able to determine our average daily consumption while boondocking was 20Ahrs per day.  It is nice to have an accurate understanding of your power situation so you can truely manage your batteries.

After reviewing our average daily consumption, we decided to swap out our internal bulbs with LED lights.  The LED's use about 1/3 of the power that a standard bulb does, and we found LEDs that provided the warm light color that matched the bulbs.


We also swapped out the outside porch light and cargo light in the front of the trailer with brighter LED's.